The Hangar Rat Story
http://www.swoot.com/RatsNest.html
by Harry Barr
In the year of 1979, I was Chief Engineer for a fleet of aircraft owned by Seneca College of Toronto. Our fleet was hangared at Buttonville Airport, just north of Toronto and also, this airport was the home base for a flight training and charter service, known as Toronto Airways.
1979年、私はトロントのセネカ大学の航空部のチーフエンジニア(C.E)だった。
この航空部はトロントの北のバトンビル空港に格納庫を置いていて、この空港はトロント航空における飛行訓練とチャーター便の拠点でもあった。
Shortly after taking the position with Seneca, I became acquainted with the Chief Engineer of Toronto Airways and as time went on we became good friends. His name was Ross Campbell, and during conversations over coffee, we found that we were both modellers.
セネカ大学に職を得てまもなく、私はトロント航空のC.Eであるロス=キャンベルと知り合い、珈琲を片手に語り合ううちに親友になった。2人とも模型飛行機好きだったからだ。
A short time later, I happened to build a Sig indoor trainer (the Sig Parasol) and took it to work one day to test fly in the Seneca hangar. Ross joined me, and was hooked, and the following week he showed up with his own version of the same model.
その後、私は「SIGインドアトレーナー(Sig Parasol)」【※】を作って格納庫で飛ばす機会があり、ロスも一緒だったのだが彼は(機体を天井に?)引っかけてしまった。翌週、彼は同じ機体の「ロス風バージョン」を持参した。
【※】the Sig Parasol は2010年現在でも販売されています。
http://www.sigmfg.com/cgi-bin/dpsmart.exe/MainBodyV5.html?L+Sig+okof2580+_Ddpsearch1_02SIGFF15
キット価格は8.99ドルだそうです。
During lunch breaks, we flew these models, and in the natural course of events, a friendly competition developed. As often happens, advantages in performance became paramount to winning, and we were both looking for "a bit more time".
昼の休憩中、私たちはこれらの機体を飛ばしまくったのだが、それは自然な成り行きとしてフレンドリーな競技会の様相を呈した。
しばしば起きる性能上の優越はより高い次元の勝利に結びつくので、我々は互いに“あと1秒”を追求した。
About this time, I felt that a cambered wing section might give me an edge, and proceeded to build a wing along those lines. The wing area remained the same and no other changes took place at that time. This was a surprise to Ross, but he was quick to respond. I helda slight edge for a while and then Ross countered with a wing of his own design, and so it went.
get [have] an [the] edge on [over] ... …より有利である.
このとき、キャンバーをつけた主翼が優位性をもたらしたように感じたので、私はそうした方針に沿って主翼を作ることを進めた。その主翼は、その際に行なわれた、似たような他のどんな変更にも増して生き残った。
これはロスにとって驚きだったが、しかし彼の反応は素早かった。しばらくの間、私がわずかな優位性を保ったが、それからロスは彼独自のデザインによる主翼で対抗し、その競い合いは続いた。
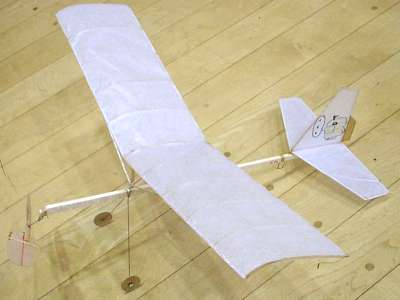
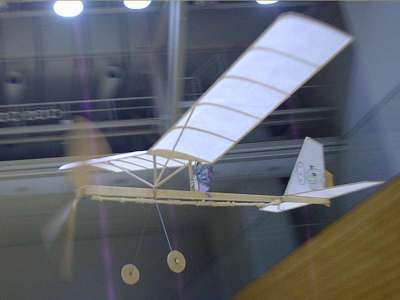
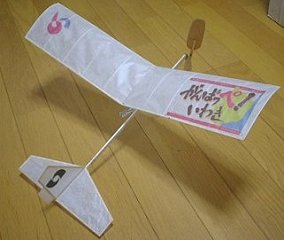
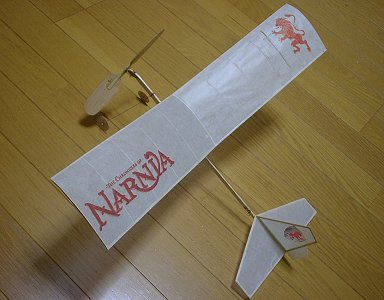
Many changes took place in this period, such as a slim downed fuselage, enlarged tail surfaces, parallel lift struts, a better prop hanger, lighter wheels, and experimentation with rubber sizes. We eventually ended up with what became known as the "Hangar Rat".
この間において多くの変更が行なわれた。すなわち、胴体のスリム化、尾翼面積の増大、並行した主翼揚力用支柱、よりベターなプロペラハンガー、車輪の軽量化、そしてゴムのサイズに関する試行。
(こうして)私たちは最終的に「ハンガーラット」(以下"HR")として知られている機体を作り上げた。
We spent many hours flying this little aircraft, and despite a low ceiling (15 feet) we consistently put up times that ran between a 1 min. 05 sec's to 1min. 08 sec's.
Neither of us was never able to best the 1 min. 08 sec's in that building.
私たちはこの小さな機体のフライトで多くの時間を過ごし、そして15フィート(約4.6m)ほどの低い天井にもかかわらず我々は一貫して1分05秒から08秒といった記録を積み上げた。
私たちのいずれも、この建物で1分08秒のベスト(を超える記録)を達成することができなかった。
Dawn was drawing to an end. I changed jobs and was to spend some time in various locales in Canada, and the U.S.A.. As a result I lost touch with Ross as this period ended. Bitter sweet memories indeed.
黎明期が終わりを告げ、私は転職しカナダや米国の様々な地域で過ごした。結果として私はこの期間が終わるまでロスとの接点を失った。それは確かにほろ苦い思い出だった。
Modelling has always been my first passion, and despite working, raising, (and paying), for a family, home, etc., I always managed some time to build and fly model aircraft. The HR was not forgotten during this period; and short term memory loss was still a few years down the road.
As a result, in the early part of 1979, in a brilliant burst of babbling insanity, I produced a drawing and a one page run-down on how to put this little aircraft together.
babbling 喃語
insanity 狂気
run-down on 報告・要約・概要
put ~ together ~を組み立てる
家族や自宅やその他の諸々のための、仕事や子育て(や支払い)、にもかかわらず、模型飛行機は常に私の第一の情熱だった。私はいつも模型飛行機を作って飛ばすための時間をひねり出した。
この数年間、短い間だけ記憶から無くなることはあったが、ハンガーラットは忘れ去られることはなかった。
そして1979年の早い時期、赤ちゃんコトバが華麗にはじけるような狂気として、私はこの小さな飛行機を組み立てるための記事と図面を仕上げた。
Before I lost my nerve I addressed it to Bill Northrop of "Model Builder" Magazine, and dropped it into a mail box.....you remember them don't you?
No Clancy, there was no email in those days! (gasp!)
Sanity finally prevailed however and other things drove the HR from my mind as I wrestled with house repairs, work, etc.
気力を失わないうちに、私はモデルビルダー誌のビル=ノースロップに手紙を書き、ポストへ入れた…。(この投稿は)気に留めてもらえるだろうか? …そうさクランシー、そのころまだ電子メールはなかったのだよ(ああ!)。(←訳者注:すぐに確かめようにもそれは簡単ではない、の意味と思われる)
しかしながら最後には正気が勝り、家の修理や仕事などの諸々との格闘が、私の心からハンガーラットのことを押し出してしまった。
And then......(sounds of a fanfare) the mail box (yes Clancy, again) spewed forth a letter from Mr. Northrop for my attention.
Upon opening this missive, I was extremely surprised to find a cheque for $60.00, and a pleasant letter than king me for my article on the HR, and advising me that I could look forward to seeing it published in the month's to come.
そしてある日…(ここでファンファーレ!)、郵便受けが(再びクランシー風に)ノースロップ氏からの手紙をはき出すのが私の目に留まった。
その書状を開くと、60ドルの小切手が入っていたことに驚かされた。そしてそのご機嫌な手紙は、ハンガーラットの記事について私を王様のように持ち上げ、それが出版される月の到来を待つよう私に伝えていた。
So much for memory loss; I had completely forgotten the article until this letter arrived!
True to his word, Mr. Northrop published the article in the July 1979 issue of the magazine, and I became a published author. Wow!
記憶喪失についてはこれぐらいにしておくが…
この手紙が着くまで私はその記事のことを完全に忘れていた。
ノースロップ氏の言葉は真実で、彼は(月刊モデルビルダー誌の)1979年7月号の内容としてその記事を出版してくれ、そして私は作家となったのだった。(ワォ!)
Field Rat Fun Fly Page
http://www.swoot.com/funflyratpage.html
────────────────────────────
The Hangar Rat
ハンガーラットのこと
http://www.theplanpage.com/things/rat/brat.pdf
by Harry Barr, Model Builder, August 1979
... A cute little rubber job that is easy to build and fly
... 作りやすく飛ばしやすい、ちっちゃくキュートなゴムのヤツ
"Hangar Rat" owes its existence to the "Sig Parasol," a simple, easy-to-fly, tissue-covered profile model. Having built one of these with a cambered wing, I proceeded to fly it every lunch hour in the hangar, where I worked, until it was so tattered it was retired to a place of honor above my bench. Needing another fun machine that could be built in a hurry, "Hangar Rat" evolved, using the same airfoil I had used on the Parasol.
ハンガーラットは、シンプルで飛ばしやすい紙貼りのプロフィルモデルである「Sig Parasol(シグパラソル)」に由来する。
キャンバーを付けた主翼を持つそのうちの1機を、私はそれがボロボロになって私のベンチの上の名誉ある場所に引退するまで、いつも、勤務先の格納庫の昼食時間に飛ばしていた。
短時間で作れるさらに楽しい機体が求められたので、(Sig Parasolと)同じ翼型をもつハンガーラットに発展した。
It has been a success right from the first flight, with average flight times under a 20 - foot ceiling of 50 sec., with a best flight to date of 1:08 and many flights over a minute. It is easy to adjust and build and will bring pleasure to both the beginner and the jaded R/C nut (like me). It brings back memories of simpler times when modeling was less complex and expensive.
成功の光明は最初のフライトで見えた。6mほど(20foot)の天井で50秒平均、ベストは1分08秒。多くのフライトが1分を超えた。初心者にも、くたびれた変わり者のラジコンフライヤー(私だ)にも、調整と製作がしやすかった。
それは模型飛行機が今よりずっと単純で安く手に入ったシンプルな時代を思い起こさせた。
If you are a beginner, follow the plans closely and you will be rewarded with a fun flying machine.
If you're an old hand at the game you probably have your own ideas about a lighter airframe, better prop, etc. Regardless, have fun!
もしあなたが初心者なら、図面通りに作ることで楽しい飛行機という報酬に恵まれる。
もしあなたが競技種目の熟練者ならたぶん、より軽量な機体構造・より優れたプロペラ、等の知識を持っているだろう。
まあどっちにせよ楽しんでくれ。
Construction
作り方
Let's start with the wing and get that miserable so-and-so out of the way.
Using the side view of the fuselage, cut a template from 1/32 plywood of the rib profile.
Reinforce the edges of this template with a Cyanoacrylate type glue to toughen them against knife knicks.
Using this template, slice out ten ribs 3/32 deep from 1/20 sheet and two full depth ribs from 1/16 sheet.
miserable 悲惨な
so-and-so まあまあの
out of the way 邪魔にならない
主翼からはじめ、なにがしか目立たず邪魔にならない所に置いておく。
胴体の側面図を用いて、0.8mm厚の合板からリブ型のテンプレートを切り出す。
このテンプレートの縁の部分はナイフがあたっても大丈夫なように瞬間接着剤で強化しておく。
このリブ型テンプレートを使い、断面のタテ方向が2.4mmあるように10枚のリブを1.2mm厚の板から、さらに下面がえぐれていない形(full depth)のリブ2枚を1.6mm厚の板から切り出す。
Protect your drawings with Saran Wrap or something similar and pin the wing frame to your building board.
Use the dihedral jig to set the root rib angle accurately and glue the root rib (the full-depth rib) in place.
Add the gussets at the root and allow to dry thoroughly.
Since the wing is bilaterally symmetrical, the same wing drawing can be used to build the second panel merely by moving the root rib to the opposite end.
bilaterally symmetrical 左右対称
サランラップか何かで図面を保護してから、主翼の棒材を工作台の上にピン留めする。中央リブ(下面がえぐれていない形のもの)は上反角治具を使って正確に角度を付け、(前後の棒材に?)挟み込んで接着する。
ガセット(隅の補強材)を中央部につけ、十分に乾かす。
主翼が左右対称であるため、同じ図面から2枚目の(片側)主翼パネルを作るには、中央リブの位置を(1枚目とは)反対側にすること。
Once both panels are framed up, gently sand the leading edge to a rounded contour and re-glue all joints. Do not join the wing panels at this time! Set them aside for now.
contour 輪郭線
両側の主翼パネルが組み上がったら、前縁を丁寧に輪郭に沿って丸めるようサンディング(紙ヤスリがけ)し、(必要なら?)全ての接合箇所を再接着する。
(2枚の)主翼パネルはまだくっつけてはいけない! とりあえず脇に置いておく。
The tail surfaces and cabane structure are built flat over the drawings using the time-honored method of pinning and gluing. The only point worth noting here is the method of joining the stabilizer leading edges. This is stronger than a butt joint. The 1/32 trim tab is cut out now, sanded, and set aside. Do not glue to the fin at this time. Lightly sand surfaces and check all glue joints.
time-honored method 昔ながらの方法
尾翼面とキャビン(操縦席)の構造部は昔ながらのピン留めと接着の方法で図面上に平面で作る。
ここで注目すべき唯一のポイントは、水平尾翼前縁の接合についてである。ここは(単なる?)突き合わせ接合(=イモ付け?)よりも強い(必要がある)。
0.8mm厚のトリムタブを切り出し、サンディングして脇に置いておく。このフィン(=トリムタブ)はここではまだ接着しない。
表面を軽くサンディングし全ての接着箇所をチェックしておく。
The motor stick is a firm piece of 1/8 x 3/8 balsa. Pick a good straight piece and after cutting to length, taper the bottom (from front to rear) to 1/4 x 1/8. Sand to suit your personal tastes.
モータースティックは硬めの3mm×9mmバルサ材。まっすぐな部材を長さに切り出し、前から後にかけて底面を6mm×3mmになるよう削る。(が、ここは)あなた好みのテイストにサンディング(してよい?)。
The wire parts are bent up from .025 music wire.
Note that the tail skid and rear hook have a tang that pierces the motor stick approximately 1/8 of an inch.
Bind the hook and skid neatly with cotton thread and cement securely.
The landing gear is pressed over the motor stick in the proper position and it is also bound and glued in place.
Slip a pair of 1-inch wheels in place over the axles and bend the axles upward to retain the wheels.
ワイヤ部はφ0.6mmワイヤを曲げて作る。尾ソリと後部フックは胴体に対し約3mmの差込部分を持つ。
これらは木綿糸できれいに巻き、接着剤でしっかり固める。
主脚はモータースティック上の適切な位置に押しつけ、挟み込んで縛り、接着する。
一対の(直径)1インチの車輪は軽く動くように車軸に差し込み、車軸は車輪を保持できるよう上に曲げる。
The wings and tail surfaces should now be covered. Use the lightest possible grade of tissue available, iron it flat, and attach with water-thinned white glue. Cover only the top of the wings and stabilizer and one side of the fin. Do not use any dope and do not shrink the tissue.
主翼と尾翼はこの時点で紙貼りをするべきである。可能な限り軽量なグレードの翼用紙を使い、シワにならぬよう押しつけ、水で薄めたホワイトボンドで貼り付ける。紙貼りは主翼と水平尾翼の上面、および垂直尾翼の片面だけである。溶剤系の塗料は使ってはいけない。また、紙は収縮させてはいけない。
Now that the wings are covered, cement both butt ribs lightly and join, using clothespins as clamps until the glue dries. At this point, glue the cabane to the wing in its correct position. Ensure that it is perpendicular when the wing is level (equal dihedral under each tip). If such is not the case, apply your sanding block to the surfaces that contact the wing ribs until corrected. (Note: the cabane glues to the side of the root rib.)
こうして被覆された(2枚の)主翼を、それぞれの根本をそーっと合わせて接着し、固化するまで洗濯ばさみを使って固定する。
ここで、操縦席付近の構造体を主翼に対して正しい位置に接着する。主翼の水平(左右翼端が等しい上反角量になる)な状態に対して垂直であることを確認すること。もしそうでなければ、サンディングブロックを中央リブの表面に当て、修正する。[注:操縦席付近の構造体は中央リブの側面に接着する。]
Accurately assemble the tail group to the fuselage.
It may be necessary to remove a small sliver of tissue from the stabilizer center rib
in order to get a good bond between the fin and stabilizer.
Add the trim tab at this time, with about 3/8 inch right offset, Tack-glue lightly to allow for adjustment.
尾翼群を胴体に対して正確に取り付ける。
垂直尾翼と水平尾翼の間をよりよく接着するため、水平尾翼の中央リブ(の上面)から、紙の一部を取り去っておく必要がある。
ここでトリムタブを取り付けるが、右旋回方向へ約9.5mm傾け、調整可能なように軽く仮留めにしておく。
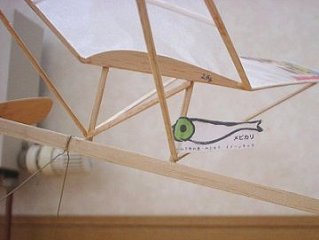
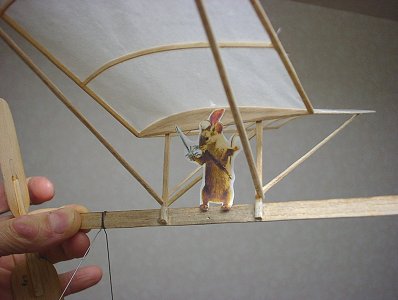
Cut "Mr. Rat" from foam or balsa, decorate, and glue in place.
"ミスターラット"は発泡材やバルサから切り出し、色付けして所定の位置に貼る。
I used a 7-inch plastic prop, and the prop hanger was the one supplied with the Sig Parasol. This simply slides onto the stick. If you wish, a metal strap or aluminum tube type can be used instead, as long as it's securely bound and glued. Make sure that 3 degree; to 4 degree; of down thrust is built into the hanger, no matter what type you use. Use a drop of rubber lube on the prop shaft.
私が使った7インチ(直径:約18センチ)のプラスチックペラは、ハンガー部分も含めて「Sig Parasol」用のものだった。これはスティックに対してシンプルにスライドする(?)。もしお望みなら、金属線またはアルミニューム管タイプのものを代わりに用いても良い。しっかりと固定され接着されるならば。
どのタイプ(のハンガー)を用いるにせよ、3度~4度のダウンスラストを確実に付けること。
プロペラシャフトにはゴム潤滑剤を一滴たらしておく。
At this point, pin the cabane to the fuselage and by trial and error move it fore or aft until the "Rat" balance at the point shown. Because of the large stabilizer, the CG, is further aft than might be expected. Once balanced, mark the correct position of the cabane and glue it in place. Ensure that the wing is properly levelled and the incidence angle is correct. Adjust to suit.
この時点で、機体が図に見られる位置でバランスするよう、操縦席部分の胴体に対するピン留めを前後させるようにトライアンドエラーで動かす。水平尾翼がより大きければ、重心位置は期待されるところよりさらにうしろでも良い。バランスが出来たら、その位置をマークし操縦席部分を接着する。主翼の水平が適切であること、迎角が正確であることを確認。(そうでなければ)合うまで調整。
You can now add the 1/16 x 1/8 lift struts. The small "X" on the wing drawing gives its location on the wing, and the side view of the fuselage indicates the struts' position. Although the struts' forward position is unorthodox, I placed it there for a reason. if the "Rat" contacts an obstruction, the strut takes the brunt of the collision and protects the leading edge of the wing. It's much easier to repair the strut than the wing.
ここまで来たら1.5mm×3mmの断面の揚力支柱(注:主翼を上に曲げる力に抗するための支柱)を取り付けることができる。図面の主翼の上および胴体側面に小さな"x"で示されているのが支柱の位置である。
支柱のうち前方の位置のものはオーソドックスではないが、私は以下の理由で取り付ける。(すなわち)HRが障害物に接触する際、この支柱は衝突に対する先鋒となり、主翼の前縁を守るのだ。主翼そのものを修理するより、支柱を修理する方が簡単だ。
If desired, initial glides can be done with the rubber motor left off. It has very little if any effect on the C.G. Adjust the glide for a flat right turn of about 20 feet in diameter. My "Rat" flies best on a 17 inch single loop of flat 1/8-inch rubber. This is for the aforementioned 20 - foot ceiling. No doubt you'll want to experiment to find the best prop/rubber combination for your own site. The wheels can be bent forward or back for final trim adjustments.
必要に応じ、初期の滑空はゴムを外した状態で行なうべきだ。それが重心位置に及ぼす影響は極めて小さいから。
滑空は直径約6mぐらいの平坦な右旋回をするよう調整する。私のHRのベストは3.2mm幅×430mm×1ループのゴムだ。これは前述の約6mの天井の場合である。あなたもたぶん自分の飛行場所に最適なプロペラとゴムの組み合わせを見つけようと試みるだろう。主脚は最終的なトリム調整のために前または後に曲げてもよい。
So now you can pack in the winds and have at 'er. I hope you enjoy the "Hangar Rat" ...I still do!
これであなたは風をつかまえることができる。HRを楽しんでくれ…私がそうだったように!
|
